Tuesday 3 November 2015

New Look Pure Colour Matte Liquid Lip Colour Review

Worlds Longest Title much?! 

Hi Guys, Welcome back! Today I wanted to talk to you all about a lip product I picked up from New Look. The Pure Colour range launched in around september 2014 and has been growing ever since. I'd seen it online a few times when browsing the new look site, but never really gave it much of my time. Fast forward to a few weeks ago and I'm standing in the queue with three lip products in my hand. The one I was most excited for was, as the title suggests the matte liquid lip colour.


The colour I picked up was 65 | Plum, which is a deep berry red shade, perfect for this time of year. Firstly I want to talk about the packaging, which I have to admit is actually pretty nice for a product in this price range, It comes in a rectangular tube with thick plastic walls and a matte black top, it has a nice weight to it and feels more expensive than it is, so points to New Look for that!


The lipstick comes with a long, skinny doe foot applicator and, as you can hopefully see the product is a little on the thicker side, but you get a decent amount on the applicator which is always a bonus.


On the lips the product comes across pretty true to the colour in the packaging, it is matte but not overly drying, it is a little bit drying it isnt overly uncomfortable to wear. However it does go on slightly patchy and being thick it does tend to sit on the edge of your lips when applied, but this can be rectified if applied carefully, and being a deeper colour I would recommend applying with a mirror. Once its dried though it doesn't transfer from the lips onto anything else (Yes, I kissed the back of my hand for you guys) which is another bonus for this product.


Overall I would recommend going and checking out this product, it comes in a couple of different shades if this particular colour isnt for you. But I do really like it! Priced at £3.99 you can't really go wrong with this product.
New Look Pure Colour products can be purchased online and in store at stores, unfortunately they are only available in the UK.

Hope you guys have enjoyed this, let me know in the comments section below, or on twitter if you have tried this product and what your thoughts were!

Talk to you soon
Byee xx

Sunday 1 November 2015

Nailed It! Nails Inc St Johns Wood

Hi everyone! Today I have another Nailed It! post for you guys, featuring a product I mentioned in a haul a couple of weeks back, Nails Inc Nailkale in St Johns Wood.


Firstly, I just want to take a moment to talk about the packaging of these polishes. Now this is the first Nails Inc polish I have purchased in the square packaging, and I have to say I am incredibly impressed with the quality. The silver cap is weighted giving the whole bottom a lovely high quality weight, the glass bottle is nice and thick and over all its just a beautiful bottle. Right, now that's out of the way, lets move on to the polish itself.


I'm not going to lie, this polish is gorgeous. A pale creamy pink that's opaque in two coats, I used three just to get a nicer finish. It applies well, leaving no brush strokes, and has a beautiful smooth finish.
In real life this shade is slightly more peachy than it looks in the picture but its still absolutely beautiful. I think I will be wearing this a lot during the summer months, but it may not be overly suitable for this time of year.

Over all this is a gorgeous polish in all aspects, apart from maybe the price tag. I actually got mine on clearance and I'm still not sure why it was on clearance in the first place, but at full price this polish stands at £14.

Hope you guys have enjoyed this, let me know in the comments section below, or on twitter if you have tried this product, or any others from the NailKale Range and what your thoughts were!

Talk to you soon
Byee xx

Friday 30 October 2015

Halloween Cobweb Eye Make-Up

Hey guys, Today I wanted to do something a little different, and show you guys a quick make-up look you can do last minute for a Halloween party.

As the title suggests the focus of this look is going to be cobweb detailing around the eye, you can do this to both eyes if you prefer but I think it looks great over just one eye, and obviously, only doing it to one saves time!

To start with you will need to to have everything ready for your look, I'm not going to say you need the exact products I have used, just use your favourite products that you have to hand.

I ended up not using a couple of the products shown

So instead, I'm going to give you a list of things you will need :-

Face
  • Foundation
  • Concealer
  • Blush
  • Powder
Eyes
  • Primer/Cream Eyeshadow
  • Eyeshadows (preferably smokey shades)
  • Eyeliner - Gel/Pencil/Pen
  • Mascara 
Lips
  • You can pretty much use any colour on your lips, I went with a purple lip butter, but you can do neutral if you want to keep the attention on your eyes, but remember, its a Halloween look, so have fun with it!
You will also need your usual arsenal of make up brushes.

Right, Long introductions asides, lets get started! You'll first need to create a nice canvas for your eye make up so I started with my face make up, using foundation, and concealer to make a nice smooth base, I then added some blush and set it all with powder.

Next, taking your eyeshadow base, I used a cream shadow stick from ELF Cosmetics, apply this to your eyelid and blend out until you have something like this -

Base Colour

Then start to build up a nice smokey eye, I used the Collection Work The Colour Pallet in Smokey, Starting with a medium silver shade across the lid over my base. 

First Shadow

Next coming in with a matte black, I added depth to the crease and outer V shape.

Second Shadow

Then I lined my upper lash line with my L'Oreal blackbuster liner, and my tightline and water line with pencil liner. I also added a lighter silver shade to the inner corner to highlight and then using a clean fluffy brush I blended out any harsh lines.

Liner

Once your happy with the smokey eye you have created, its time to work on the cobweb detail. I dont have pictures of the process because I'm not exactly a smart cookie, but its super easy. All you need to do it grab a nice dark black eyeliner, a skinny felt tip style would probably work best for this, but all I had to hand was an ELF cosmetic mineral eyeliner, and draw a series of long straight lines, going from the forehead to the crease, and under the eye to the cheek bone, all the way around the eye. I started just off the centre of my eyelid, and ended just under it. Then join the lines together in curved lines to make the cobweb shape. If my instructions made sense you should end up with something like the following images.

Cobweb!

Feel free to make yours neater than mine, the ELF Pencil was not the easiest product to use for this type of look, but as you can see its actually super easy to do. The next step is a couple coats of mascara, you could eye add false lashes if you want something more dramatic. 

Finished Cobweb

Finished Non Cobweb Smokey Eye


Finish with a final dusting of powder and the lipstick/gloss of your choice and your look is complete! I would pair this look with something like a little black dress or a nice black lace playsuit and some heels and you are good to go.
Finished Look!


And there you have it,  a quick and easy halloween look for any last minute parties you might be attending!

Hope you guys enjoyed this! Let me know, either in the comments or on twitter what you think of this and if you want more things like this in the future.

Talk to you soon
Byee xx

Saturday 24 October 2015

Nailed It! - Rimmel Mercury

Hi guys, Today I have a long over due Nailed it post! Does anyone remember these from way back when? My last one was back in April 2014.. Oops!

So basically, asides from the obvious "I haven't been blogging" the other reason why I have done one of these in a while is that I was having my nails done by a friend of mine, and I was pretty much having the same boring colours on my nails each time, and to be honest, the quality of the work wasn't always that great, but I have since taken my gels off and will be going back to doing them myself now that they have grown slightly.. Well for the most part. 
Please also bare in mind, these photos were taken a few week ago and I have since had gels on, and off again so expect more Nailed It! posts in the near future! 

So today I'm going to be talking about Mercury from the Kate Moss for Rimmel Salon Pro Range.


Now I want you to take a minute to look at how nice this polish looks, I fell in love pretty quickly when I saw this in the store and popped it into my basket with great enthusiasm. The colour is this really beautiful pale olive green with purple and rose gold shimmer running through it, it almost looks like an 'Oil Slick' polish but lighter and greener.. however this beauty doesn't translate onto the nails. 


On the nails this looses all its shimmery, multi tonal goodness and becomes a bland green shade, which ordinarily wouldnt be a problem, but the issue here is that its so beautiful in the bottle and I thought it would look equally as nice on the nails, you know being slightly different colours in different lights, and its just not. Its not a terrible colour, its just a little disappointing.
The polish itself is opaque in two coats but does show brush marks so you have to be careful how to paint in straight lines.

So overall, its not a terrible polish, I do like it, but it is a disappointing product.

Rimmel Kate Salon Pro Polishes retail for £4.49 and can be purchased in most drug store and supermarkets in the UK.

Thanks for reading guys.
Talk to you soon
Byee xx

Lord And Berry Kit Box - An In Depth Look

Hi Guys, So if you saw my most recent haul, you'll know I picked up a Lord And Berry Kit Box from Boots for just £5 on clearance. Now, I wasn't even aware Boots stocked Lord and Berry, (Just did a quick search of the website and it doesnt look like they do) so spotting these took me a little by surprise. They actually had three different ones to pick from but the eye liner selections seemed most appealing to me so thats the one I picked up.

Actual box it all came in

So these little kits come with three to four products in a little zip lock pouch that is actually quite nice, its covered in graphic print featuring 'Lord and Berry' and other quotes. I don't see myself using it for anything in particular, but it is a nice quality bag.


This Kit Box came with three different black eyeliners, a Kajal kohl, a gel and a glitter.


Each of these eyeliners are lovely products, they are all nicely pigmented, particularly the gel pencil, which is a nice deep black. They are smooth and easy to use, and overall it a great set for the price I paid.

However, it would appear that the kit boxes are no longer available, which explains why they were on clearance, but you can purchase each product individually from the Lord&Berry website, although this will obviously cost you more.

Prices are:
Polish - £10
Paillettes - £9
Silk -£9

Thats it for today guys, I hope you enjoyed this post.
Talk to you soon
Byee xx

Wednesday 14 October 2015

Haul Time

Surprise Surprise.. 

I went shopping..
Hi Guys, Yes its that time again where I share with you the things I picked up when I went shopping, Honestly its nothing overly exciting but I hope you enjoy.

So the first place I went was Primark, I actually made a beeline straight to Primark because I wanted to see if they had their Christmas Pjs in yet, and the answer is YES! They do indeed.


Polar Bear Leggings - £6.00
Check PJ Bottoms - £6.00
Star Wars Tshirt - Mens Section (Not PJ) - £5

Next I popped into New Look and picked up some Lip Products from their Pure Colour Line


Pure Colour Lipstick - £3.99
Pure Colour Liquid Lipstick - £4.99
Full review of these products coming soon, so keep your eyes peeled!

Lastly I popped into Boots and found myself some bargains..


Nails Inc Nailkale Nail Polish in St Johns Wood -£3 on clearance 
L'Oreal Infallible 24H Foundation - £9.99 (3 For 2)
Lord And Berry Kit Box - £5 on clearance 
L'Oreal True Match Concealer Crayon - £4.99 (Free on 3 For 2) 
L'Oreal Superliner Blackbuster - £6.99 (3 For 2) 

Many of the cosmetics mentioned in this haul will be getting their own individual posts with in depth photos and comments etc so look out for those coming soon, 

I hope you enjoyed this quick little haul. 

Talk to you soon
Byee xx

Wednesday 7 October 2015

My Hair - An update

Hi Guys!

For todays post I wanted to talk to you all about my hair, and the many changes it has been through since I last blogged about it back in January 2014! Here's a link to the last post about my hair. I actually cant believe its been so long since I mentioned my hair so that means this post might be slightly longer than I had originally thought.. So here goes.


Oh, One more thing I want to mention before I start, the pictures for this post will be mainly taken from my personal facebook page, so I apologise in advance for the potato quality of images. Onto the post.. 

I should probably mention that I am not the type of person who has their hair done every 6-8 weeks or anything like that, I pretty much go to the hair dressers when I can no longer put it off anymore. So keep that in mind as you read on..

So if you read that linked post you'll know I had my hair ombre'd back at the beginning of 2014, I talked in the post about how I had gone for a warmer blonde as it was the first time and I wasnt sure how I was going to feel about it and to be honest I just wasnt really brave enough to full on go for it.
I then went back to the hairdressers a few months later and this time had a different stylist, and we talked about going brighter with the blonde and putting a lot more blonde into my hair as opposed to the standard ombre look. Since I had been growing it out for a while I said I wanted hardly anything taking off the length and just some layers cutting in and my side fringe shaping a little bit more.

November 2014

In the above photo you can see how long it had gotten, I was incredibly proud of my hair at this point as even with the bleaching it was surprisingly healthy.

December 2014

In this photo you can see that my blonde goes quite high up in my hair, creating more of 'just grown out' ombre instead of the standard lower ombre.

January 2015
Fast forward just a few weeks (I apparently like having my hair cut just after the new year) and I returned to my usual salon and stylist, and opted to have the length cut, and some more blonde added. 
I made a huge song and dance about the fact that I was having "It all cut off" but in retrospect it was only about 5 inchs, which is still alot, especially considering how long is was in December. You will notice the style of my hair never actually changes, only ever the length and colour. 
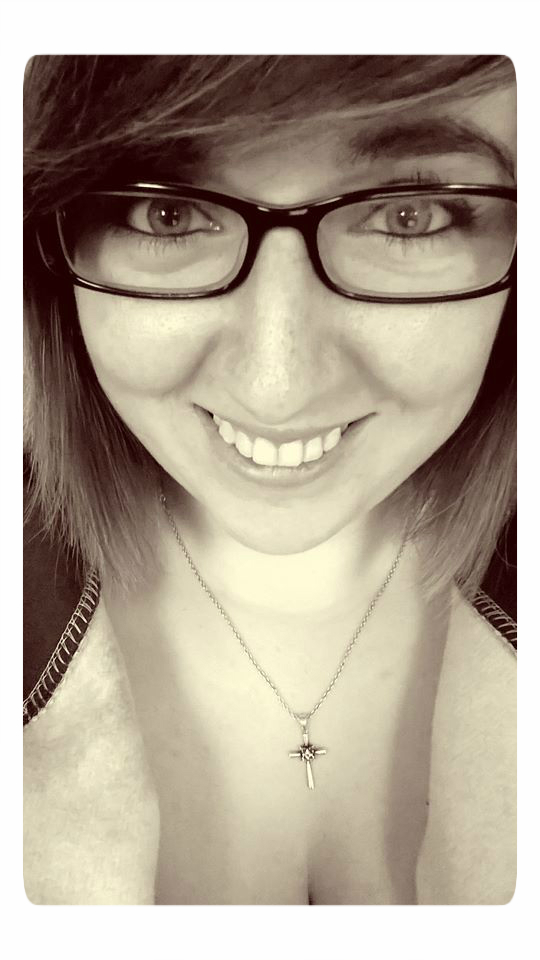

June 2015

Lets fast forward again to June where I once again returned to the salon and this time actually had the majority cut off. This is actually much shorter than I originally asked for, I asked for it taking up to about where my necklace ends, and as you can see, its much, much shorter than that, which was actually really scary for me because I was so used to having long hair I wasnt sure how I felt about having short hair, but it was too late for me to do anything about it at this point. The stylist cut my hair then coloured it so he could get a feel for where to put the colour and wouldnt be wasting product which was fine by me. 

June 2015


The above photo was taken five days after my trip to the salon, and at this point I had decided I actually really liked it shorter. You can also see the amount and the shade of blonde the stylist had put into it which again I really liked, it was different for me and I think thats what I liked most. 

July 2015
I hadnt actually been back to the salon at this point but this picture sort of shows the blonde highlights through my fringe, as I mentioned this really wasnt your typical ombre anymore, it had evolved into.. Well I'm not quite sure what, but I liked it alot.

September 2015
Which brings us all the way up to the beginning of September when I went to a different salon. I had started toying with the idea of changing my hair colour because I was kinda growing tired of the blonde, it had been well over a year since I first had blonde put into my hair and I was just.. bored I guess. When I actually booked my appointment I got talking to the stylist about what I wanted and I was very adamant that I didnt want my length touching, I was "growing it out" etc etc, but on the day of my appointment I walked in and very confidently proclaimed "cut it off" and thats just what the stylist did, we actually decided to take it a bit shorter than the stylist originally wanted but we both ended up very happy with the result. 
Now, your probably wondering what made me change my mind, and it comes back to this idea I had of changing the colour. I decided I did actually want to colour it, and that I did actually want to grow it out, but with all the bleaching, my hair wasnt exactly unhealthy but the bleach had definitely had an effect on my hair, and if I was growing it out, I wanted it to be as healthy as possible. 

September 2015


So a couple days after my hair cut, I went to my local super market and picked up a box dye, I should mention I am no stranger to box dyes and I spent much of my teenage years dying my hair various different colours. The dye I chose was Iced Chocolate by L'Oreal and a few days after purchasing it I went to my mums to dye my hair (mum has a shower attachment over the bath, where as my flat doesnt. Also a helping hand never hurts) 

I am honestly in love with my hair now, the colour is amazing, and very much multi tonal which I'm glad about because I didnt want a flat colour. I also only mentioned this to one or two people so when I rocked up to work with dark hair a couple of people actually didn't recognise me and I got told off for changing my hair twice in two weeks and had to explain to people that this is it now, I'm done changing my hair.. for now at least. 

Hope you enjoyed this this post and if you stuck with it until the end you deserve an internet high five!

I will be posting an updated hair care routine at some point soon so you can see the types of products I'm using now my hair is short and brunette..

Talk to you soon
Byee xx


Tuesday 6 October 2015

Book Talk - An introduction

This could be the start of something beautiful..

Hello and welcome to BookTalk! This is going to be a new series of posts where I talk about the books I have been reading, buying and perhaps just the books I feel I need in my life.. which tends to be all of them!

I thought I would do like a quick introduction to this series before doing my first real post, I think it will better this way instead of trying to do an introduction and post at the same time.. So I hope this works out the way I want.

I dont think I have ever really talked about my love for books and reading on my blog before so I feel like if I dont give you a bit of background this series is going to feel a little bit out of place.. 

I am a huge book worm, I love it, I seriously, seriously love it. I love that feeling you get when you read, that feeling of being completely immersed in a different world, in a story that isn't your own, surrounded by characters you feel like you know. It's an escape from a reality that sometimes you arent ready to confront. I actually get a lot of stick from my friends because I don't really watch movies, they name movies and I'm just sitting there, blank faced, like "never seen it".. and I think a lot of it stems from the fact that I missed them when they first came out, and movies just don't do it for me. Nothing is imagined, its all right there on the screen and two hours later its over and, I dunno I just don't find myself enjoying a movie the way I do a book.. I might be biased but that's just how I feel. 

I could spend hours in book stores just looking at all the books, slowly and carefully choosing the ones that appeal to me and that I feel I need in my collection, some of these books are part of a series
I've been reading, some of these are standalone books by authors I love and some just draw me in immediately.

Personally I get a lot more reading done in the winter months when it gets darker and I can snuggle up on the sofa with a hot drink, a few candles burning and just loose myself in the pages. So I'm actually looking forward to the next few months! Hoping to get through quite a few books so I can make a Christmas list of books I want.. If I don't treat myself before then...

So yeah, in this new series I will be posting reviews, hauls, wish lists and other book related stuff for you to check out..

I hope you enjoy this series..

Talk to you soon 
Byee xx


Saturday 3 October 2015

Skin Care Haul

Hi Guys! 

So many nice things!

Today I'm back with another haul, this time focusing on skin care products. I was running low on a couple of products and instead of repurchasing products, I instead wanted to try a few things I had heard good things about but had never purchased myself.

All products in this haul were purchased from my local Boots Store, which is actually a smaller boots store so my selection can sometimes be quite limited.


Nivea Face Wipes - £3.15
Soap & Glory Smooth Operator - Was £5.00 Now £3.33 (Saving £1.67)
Soap & Glory Hand Food (Travel Size) - £2.50
Neutrogena Visibly Clear 2 in 1 Wash/Mask - £3.69
Simple Age Resisting Eye Cream - £6.99
Soap & Glory The Ultimelt Hot Cloth Cleanser - Was £10.00 Now £6.66 (Saving £3.34)

I have actually never tried anything from Soap & Glory but have heard a lot of Youtubers and Bloggers talk about the brand, I know the Hand Food gets glowing recommendations by almost everyone so I am extremely excited to try all the products I have picked up today.

I will post an updated skin care routine when I have given these products a nice trail run and will let you all know how I get on with all the products!

Talk to you soon
Byee xx